
Building a golf simulator at home used to seem like something only professional golfers or high-end country clubs could afford. But with today’s technology, any golfer with some space and the right equipment can create a setup that’s both immersive and effective.
I’ve spent years testing different launch monitors, hitting mats, projectors, and simulator software, and I can tell you firsthand—not all setups are created equal.
If you cut corners in the wrong places, you’ll end up frustrated, either because your simulator lacks accuracy or because it doesn’t feel like real golf. But when done right, having a personal simulator changes how you practice forever.
The key is knowing what you actually need, how much space is required, and where to spend your money wisely. This guide breaks it all down step by step, covering:
- How much space you need (and what to do if your ceilings are too low).
- Which launch monitors are best for your budget and playing style.
- How to set up a hitting mat, enclosure, and impact screen for the best experience.
- Projector and software options that make simulated golf feel as close to real as possible.
- Common mistakes that ruin setups—and how to avoid them.
By the end of this, you’ll know exactly how to build a golf simulator that fits your space, budget, and goals. Whether you’re looking for a basic net-and-mat setup or a professional-grade simulator, this guide has you covered.
Step 1: How Much Space Do You Need?
Before you even think about launch monitors, impact screens, or software, you need to answer one crucial question: Do you have enough space for a proper golf simulator setup?
I’ve seen too many golfers rush into buying equipment, only to realize after setup that their ceiling is too low, the room is too narrow, or their launch monitor needs more depth than they have. At that point, you’re either forced to return expensive gear or settle for an experience that never quite feels right.
I helped a friend set up a garage-based simulator last year, and he almost made this mistake. His space was technically big enough, but when he took full driver swings, his club barely cleared the ceiling. We had to rework his setup to ensure he wouldn’t be subconsciously adjusting his swing. If he had measured before buying, he could have avoided the extra hassle.
So before you get too deep into picking the best launch monitor or enclosure, let’s make sure your space will actually work.
Minimum Room Dimensions
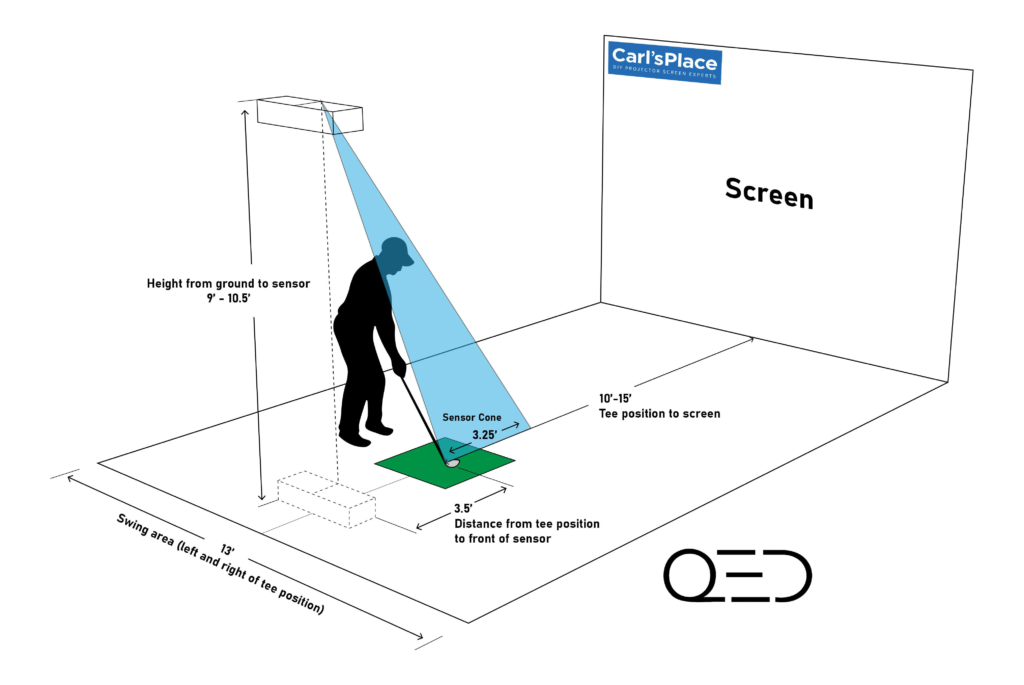
At a bare minimum, you need enough height to swing a driver, enough width to stand comfortably, and enough depth for your launch monitor to track shots. If any one of those is too tight, your simulator won’t feel right.
Ceiling height is the most critical factor. For most golfers, a 9-foot ceiling is the absolute lowest you can get away with, and even that might feel cramped for taller players. Ideally, you want 10-11 feet so you can swing freely without feeling restricted.
Width matters too, especially if more than one person will be using the simulator. A space that’s at least 10 feet wide is workable, but 12-15 feet is better, especially if you want both right- and left-handed players to be able to hit without moving the setup.
Depth depends on your launch monitor. Some monitors, like SkyTrak+ or Uneekor EYE MINI, only need a few feet behind the ball to track shots, while others, like Trackman iO, require more space to track full ball flight. A safe rule of thumb is to have at least 12 feet of depth, but 15 feet or more is ideal.
Best Locations for a Golf Simulator
Once you know your space requirements, the next challenge is finding a place in your home that actually fits those dimensions.
For a lot of golfers, the garage is the first choice. If your garage has at least 9-10 feet of ceiling height, it’s a great spot because it’s out of the way, and you can dedicate the space entirely to golf. The only downside is that if you live in a colder climate, you may need to add insulation or a space heater to make it usable in the winter.
Basements can work well too, but low ceilings are often an issue. If you have exposed ductwork or beams, make sure they won’t interfere with your swing. I’ve seen some golfers cut into the ceiling or modify ductwork to gain extra height, so that’s an option if you’re committed to making it work.
A spare bedroom can work for smaller setups, but you’ll need to measure carefully. If your room is barely 10 feet wide and has an 8-foot ceiling, you might be able to hit irons, but a full driver swing won’t happen. That’s why some golfers opt for an outdoor setup or even convert a backyard shed into a simulator room.
What If Your Ceilings Are Too Low?
Not everyone has the luxury of 10-foot ceilings, but that doesn’t mean you have to abandon the idea of a home simulator. There are ways to work around a low ceiling.
Some golfers build their setup for irons and wedges only, skipping the driver altogether. If your main goal is practice and improving ball-striking, this could still be a solid option.
Another alternative is a ceiling-mounted launch monitor like the Uneekor EYE XO, which doesn’t require as much depth as a radar-based system like Trackman.
If you’re using a garage, some golfers have modified the ceiling, cutting out a section between beams to gain an extra foot or two of height. It’s not an option for everyone, but if you’re handy with home projects, it could be a solution.
Measure First, Then Buy
Before buying any equipment, take a measuring tape and check your space multiple times. A lot of golfers get excited and rush into buying their launch monitor or enclosure, only to find out later that their room is too small.
If you’re even a little unsure, tape out a hitting area on the floor and take some practice swings. If you feel like you have to alter your swing to avoid the ceiling or walls, it’s a sign that you need a bigger space—or at least a different approach to your setup.
Now that you know how much space you need and where to put your simulator, it’s time to start looking at the equipment that makes it all work.
Step 2: Choosing the Right Equipment
Now that your space is ready, it’s time to choose the right equipment. This is where most golfers either get it right and love their setup or make mistakes and regret their purchases.
The key is knowing where to invest and where you can save without sacrificing realism. A golf simulator has five main components:
- Launch monitor (tracks your shots)
- Hitting mat (where you stand and hit)
- Impact screen & enclosure (displays your simulation)
- Projector & display (if you want full immersion)
- Simulator software (so you can play courses and analyze shots)
Let’s go through each one.

1. The Launch Monitor – The Heart of Your Simulator
Your launch monitor is the most important piece of the setup. If it’s not accurate, the entire experience suffers.
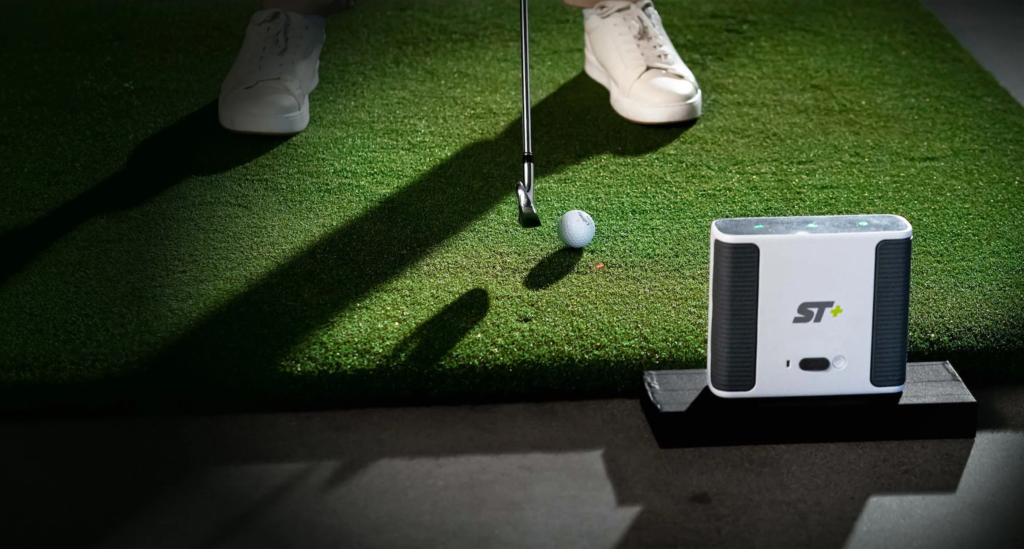
There are three main types to consider. Photometric systems (like SkyTrak+ and Uneekor EYE MINI) use high-speed cameras and work best indoors. Radar-based monitors (like Trackman iO) track the full ball flight but require more space. Infrared systems (like Uneekor EYE XO) mount overhead and track both club and ball movement without needing precise ball placement.
If you’re working with limited space, a camera-based or infrared monitor is best. Radar-based options perform better in larger areas where they can track the full flight of the ball.
Best Options Based on Budget:
- Entry-Level ($2,500 – $5,000): SkyTrak+ ($2,495), Uneekor EYE MINI ($4,500)
- Mid-Tier ($6,000 – $10,000): Foresight Sports GC3 ($6,999)
- High-End ($10,000+): Foresight Sports GCQuad ($15,999), Trackman iO ($13,995), Uneekor EYE XO ($8,000)
If you want a simulator that feels as close to real golf as possible, put most of your budget here. You can upgrade other parts later, but your shot tracking is the foundation of the setup.
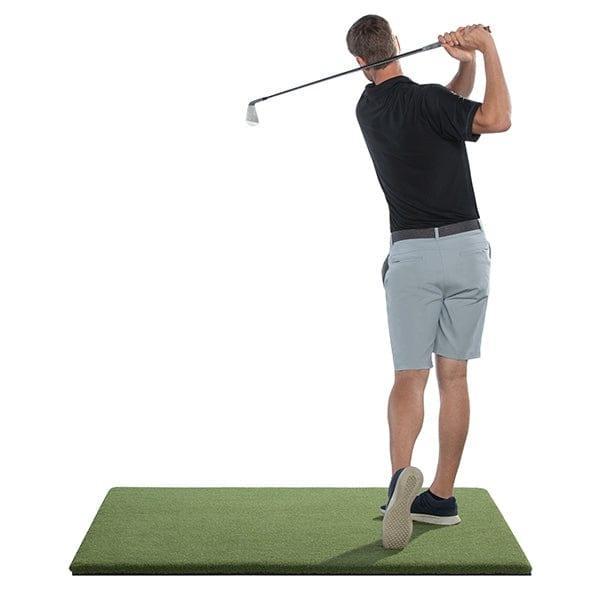
2. The Hitting Mat – Don’t Cheap Out
A good hitting mat isn’t just about feel—it protects your wrists, elbows, and joints. A bad one makes every shot feel like hitting off concrete.
Basic mats are thin and firm, good for casual play but not great for long-term use. Mid-range mats (like SwingTurf or Fiberbuilt) feel more like real grass and offer better shock absorption. High-end options (like TrueStrike) are used in professional training setups because they allow the club to interact with the turf more realistically.
If you plan on practicing regularly, a quality mat is worth the investment. A cheap mat will wear out quickly and can lead to wrist and elbow strain over time.

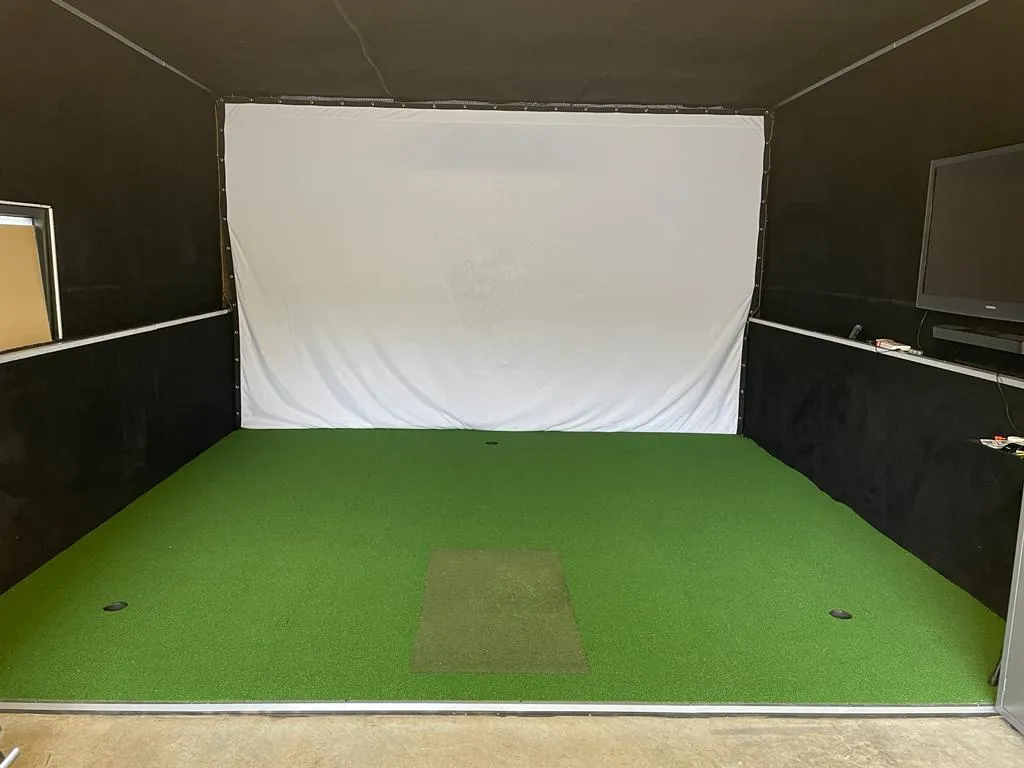
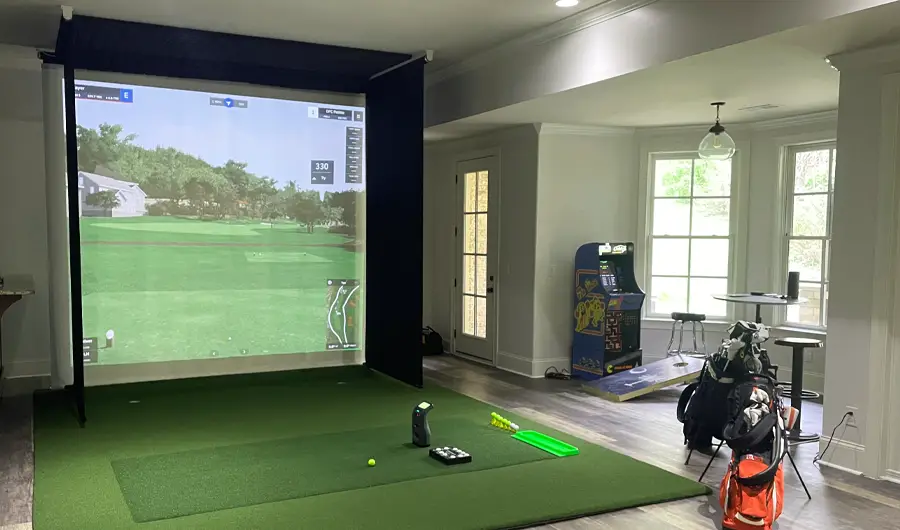
3. Impact Screen & Enclosure – What’s Worth It?
If you’re using a projector, a high-quality impact screen is essential for a crisp, clear display. A cheap screen wrinkles, stretches, and reduces image quality. Worse, some don’t absorb impact well and can send balls rebounding unpredictably.
For casual setups, a basic net works fine if you’re only using a launch monitor and not a projector. If you want a full-simulator experience, a mid-tier or premium screen is the way to go. Enclosures add a more professional look and prevent errant shots from hitting walls or ceilings.
If immersion matters to you, don’t settle for a budget screen. A good one makes the difference between a washed-out, stretched projection and a clear, high-definition display.
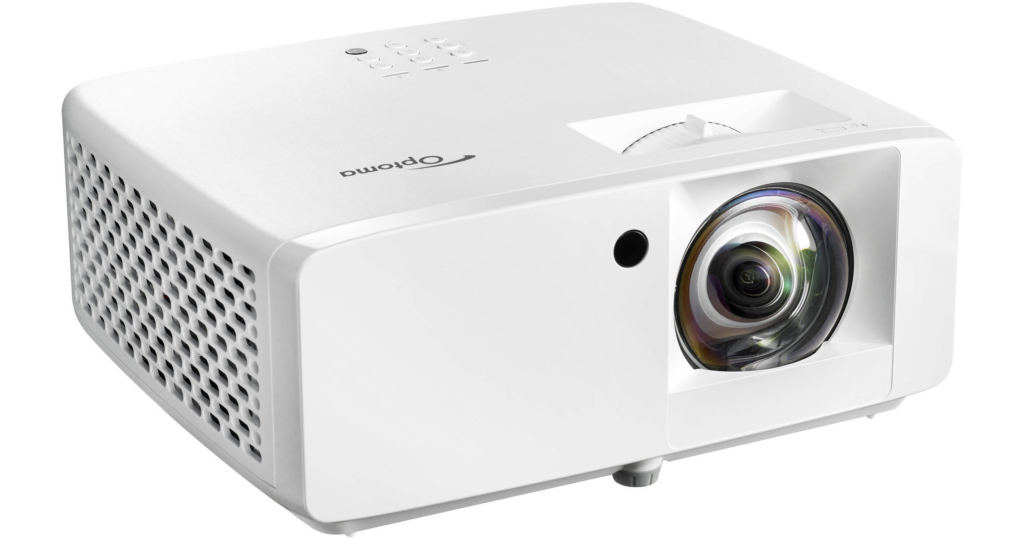
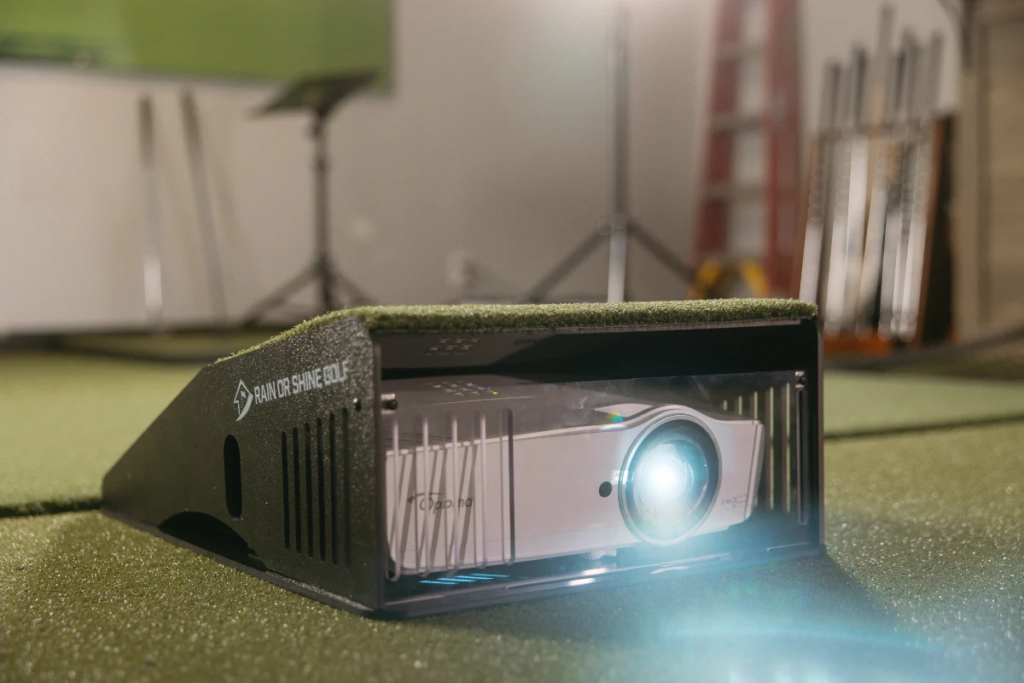
4. Projector & Display – Do You Really Need 4K?
A projector isn’t required for a simulator, but if you want an immersive, realistic experience, it’s a great addition.
1080p short-throw projectors work well for most home setups. They provide a bright, clear image without needing to be placed too far back. High-end 4K projectors offer ultra-sharp visuals, but unless you’re using a top-tier impact screen, you may not fully notice the difference.
Brightness is just as important as resolution. Look for at least 3,000 lumens so the image stays clear even in rooms with some ambient light. If you want the best visuals, pair your projector with a good-quality impact screen.
5. Simulator Software – Free vs. Paid?
Simulator software determines what courses you can play, how realistic the physics are, and what game modes are available.
Some launch monitors come with basic practice ranges for free, but if you want full-course play, you’ll need additional software. GSPro and E6 Connect are great for realistic course play, while FSX Play is the best choice for Foresight users.
If you’re just looking for a driving range experience, free software might be enough. But if you want to play full rounds on famous courses, premium software is worth considering.
Step 3: Setting Up Your Golf Simulator Correctly
Now that you’ve got the right equipment, it’s time to put it all together. This is where a lot of people make mistakes—whether it’s mounting the projector wrong, misaligning the impact screen, or placing the launch monitor in a spot where it can’t track properly.
I’ve helped set up plenty of simulators, and the difference between a frustrating experience and a smooth, realistic one almost always comes down to proper setup.
In this step, we’ll cover:
- How to position your launch monitor for the most accurate tracking
- The right way to set up your hitting mat and impact screen
- How to mount and align your projector for the best visuals
- Key mistakes to avoid when putting everything together
By the end, you’ll know exactly how to install your simulator correctly—whether it’s in a garage, basement, spare room, or a custom-built space.

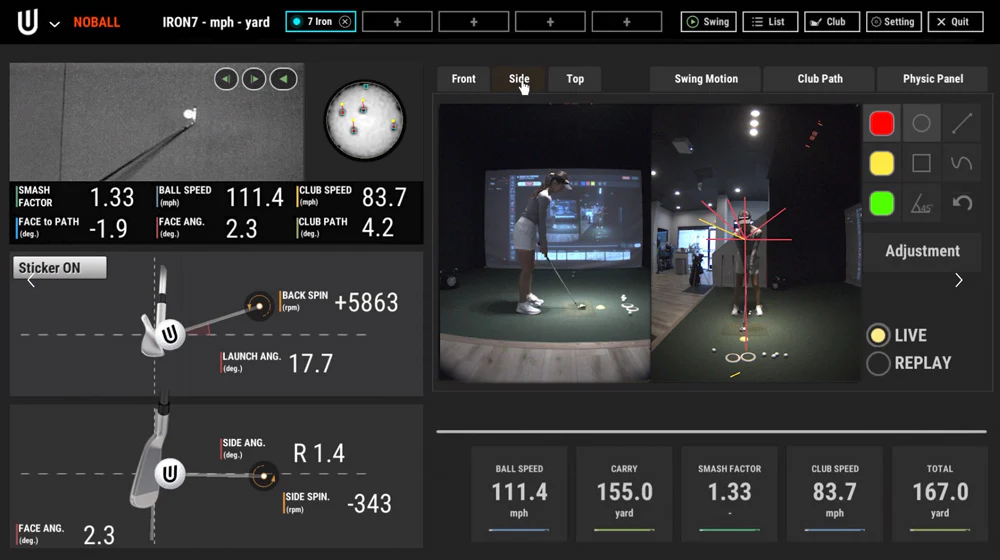
1. Launch Monitor Placement – Getting Accurate Readings
Your launch monitor is the foundation of your simulator, but it won’t track properly if it’s placed incorrectly. Where it goes depends on which type you’re using.
Photometric (Camera-Based) Systems like SkyTrak+, Uneekor EYE MINI, and Foresight GC3 sit beside or in front of the hitting area rather than behind you. These work well indoors because they don’t require much space, but they need consistent lighting. If your readings seem off, check for glare or shadows affecting the sensors.
Radar-Based Systems like Trackman iO track the ball’s entire flight and must be placed several feet behind the golfer. These require at least 15 feet of space from ball to screen to work properly, making them better suited for garages or larger rooms.
Ceiling-Mounted Systems like Uneekor EYE XO track club and ball movement from overhead, eliminating the need for precise ball placement. These are great for dedicated simulator spaces because they provide seamless tracking without any floor-based equipment.
Before locking in your monitor’s position, test it with a few shots. If distances or spin rates seem off, adjust placement or lighting.
2. Hitting Mat & Ball Placement – Getting the Right Feel
A properly positioned hitting mat makes a huge difference in how your simulator feels. Even a slight misalignment can cause your shots to appear off-center on screen, making putting and approach shots feel unnatural.
Make sure the mat is perfectly level. If your floor is uneven (common in garages), use rubber matting underneath to create a stable surface. If both left- and right-handed golfers will be using the simulator, opt for a wider mat or dual-ball position system to avoid constant adjustments.
Also, secure your mat in place. Some mats shift slightly after repeated shots, especially on hard flooring. A non-slip base or double-sided tape can prevent this from happening.
3. Impact Screen & Enclosure – Wrinkle-Free for the Best Experience
If your impact screen isn’t installed properly, you’ll notice right away. Wrinkles cause blurry visuals, poor ball return, and uneven wear over time.
To set up your screen correctly, make sure it’s stretched tightly using bungees or tension rods. If balls are bouncing back too aggressively, try tilting the bottom slightly backward or adding a floor buffer like a landing pad or foam cushion to absorb impact.
For a more polished look, an enclosure with side barriers protects your space while also improving immersion by eliminating distractions around the screen.
4. Projector Setup – Sharp, Bright, and Properly Aligned
A projector isn’t required for a simulator, but if you want the most immersive experience, it’s a must. Proper placement prevents distorted images, shadows, or a washed-out look.
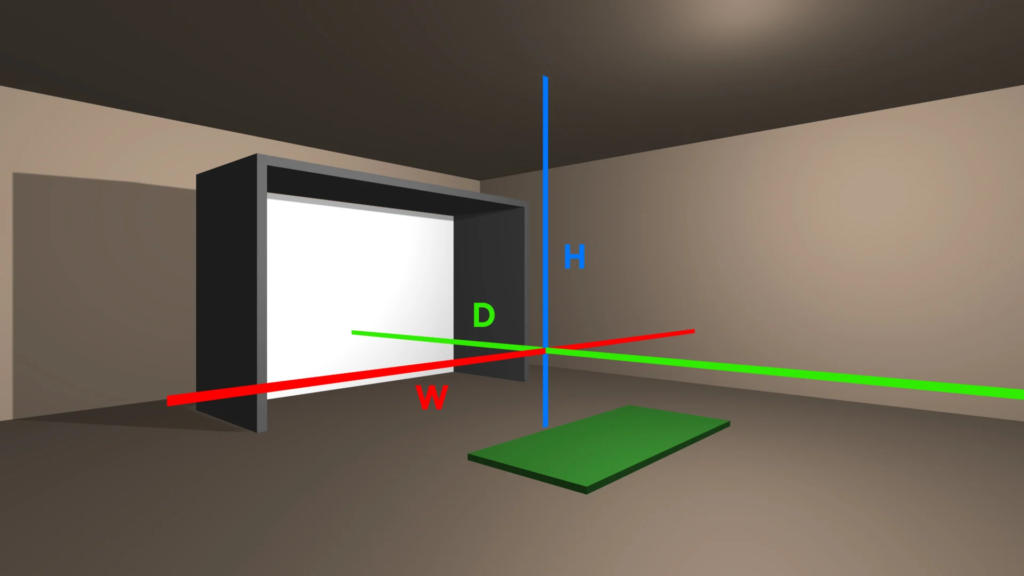
The best option is a ceiling-mounted projector for a clean, unobstructed display. If ceiling height is an issue, a floor-mounted enclosure is a good alternative. In temporary setups, a tabletop projector can work, but it often creates shadows from your swing.
To get the clearest visuals:
- Match the projector to your screen’s aspect ratio (16:9 or 4:3) so the image fills the screen without cropping.
- Use a short-throw projector to keep it close without distorting the image.
- Ensure at least 3,000 lumens of brightness for a clear display, even in rooms with some ambient light.
If you see shadows from your club or body, try adjusting the mounting height or projector angle.
5. Final Adjustments & Common Setup Mistakes to Avoid
Before you start playing, run through this quick checklist:
- Hit a few test shots and verify carry distance, spin, and ball flight look accurate.
- Check that your hitting mat stays stable. If it moves after a few swings, secure it.
- Ensure the screen is tight and wrinkle-free. If balls rebound too hard, adjust the angle.
- Confirm your projector is aligned properly. Look for distortion or cropped edges.
- Optimize your lighting. Too much glare or shadows can interfere with camera-based monitors.
Common Setup Mistakes:
- Placing a radar-based monitor too close. These need enough depth behind the golfer to track properly.
- Mounting a projector too far back. This leads to a dim, distorted image.
- Using a low-quality impact screen. Cheap screens affect both durability and image quality.
- Not testing before finalizing the setup. Always hit a few shots before drilling mounts or securing heavy equipment.
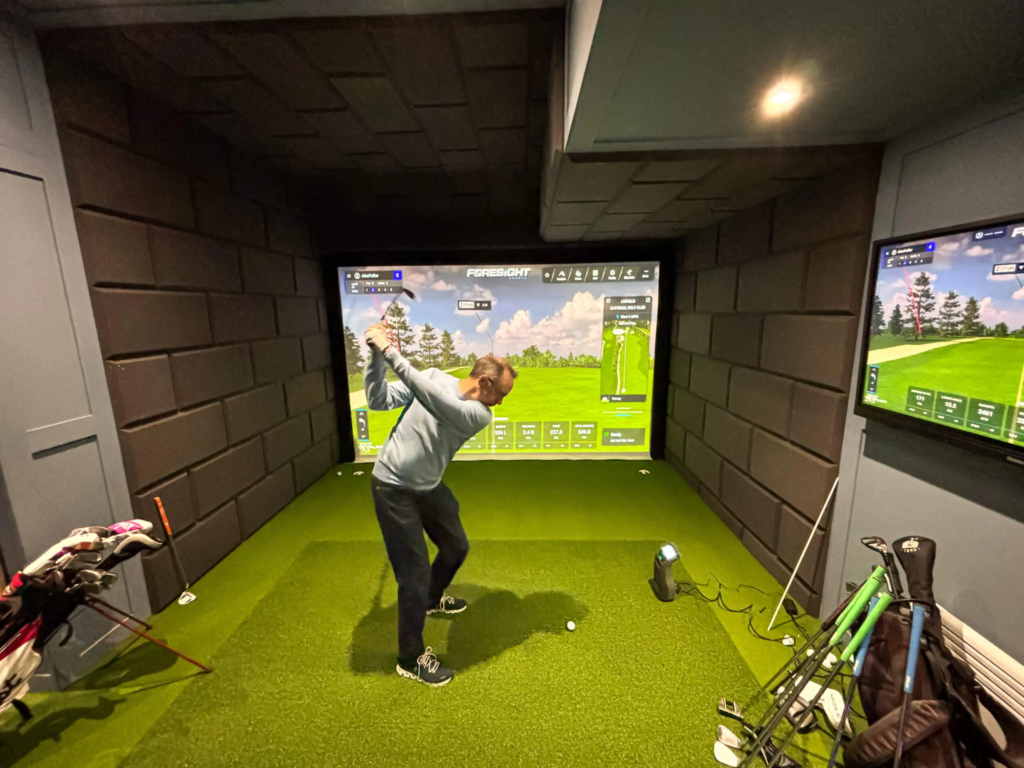
Once everything is properly set up, your simulator should feel smooth, responsive, and immersive.
Now it’s time for the fun part—playing full rounds, dialing in your swing, and making the most of your investment.
Step 4: Optimizing Your Golf Simulator for the Best Experience
Now that your simulator is fully set up, it’s time to fine-tune everything so it performs at its best. Even the highest-end equipment won’t feel right if it’s not optimized. A few key adjustments can make the difference between a frustrating experience and a setup that feels like a true indoor golf paradise.
This step will focus on:
- Dialing in your launch monitor for better accuracy
- Tweaking projector settings for sharper visuals
- Adding key accessories to improve realism
- Maximizing practice sessions so you actually get better
These are the final touches that turn a basic simulator into an immersive, pro-level setup.
1. Fine-Tuning Your Launch Monitor
Your launch monitor tracks every shot, but slight misalignments or improper lighting can throw off the accuracy. If your distances seem inconsistent or your spin rates don’t feel right, it’s worth double-checking a few things.
First, make sure the monitor is positioned exactly as recommended by the manufacturer. Even an inch too far forward or back can create inaccurate readings. If you’re using a photometric system like SkyTrak+ or GC3, ensure the ball is placed in the correct hitting zone. Camera-based systems are also sensitive to lighting—too much glare or shadows can interfere with tracking, so adjust your overhead lighting if needed.
Radar-based systems like Trackman iO need enough depth behind the golfer to track full ball flight. If you’re struggling with misreads, confirm that you have the minimum recommended space—at least 15 feet from tee to screen in most cases.
Finally, if your launch monitor supports club data calibration, take the time to go through the settings. Some systems allow you to tweak club path and face angle readings to better match your actual ball flight.
2. Adjusting Projector Settings for the Best Visuals
A poorly calibrated projector can ruin the immersive feel of a golf simulator. If the image looks blurry, stretched, or washed out, it’s likely a settings issue.
Start by ensuring the focus and keystone correction are properly adjusted so the image appears sharp and proportionate. Check that your projector is set to the correct aspect ratio—most impact screens are 16:9 or 4:3, and mismatching these settings can cause part of the image to be cut off or distorted.
Brightness and contrast should be tweaked to suit your lighting conditions. If the room is dark, you can lower brightness slightly to enhance contrast. If ambient light is present, increase brightness to ensure the display remains clear. A projector with at least 3,000 lumens provides the best image quality for most home setups.
If you notice shadows on the screen, try adjusting the mounting height or tilt angle. A well-placed projector should provide a crisp, bright image without interference from your swing.
3. Enhancing Your Setup with Accessories
Once the core setup is dialed in, a few strategic upgrades can improve the experience.
Turf and Landing Pads give the simulator a more polished look while improving ball roll and impact absorption. If you’re using an enclosure, side netting adds extra protection against mishits, especially in tighter spaces.
Proper overhead lighting can make a big difference, particularly for launch monitors that rely on cameras. LED panel lights with adjustable brightness settings help eliminate shadows and ensure consistent readings.
For those running high-end software like GSPro or E6 Connect, upgrading to a powerful gaming PC improves frame rates and overall smoothness. If you’re serious about swing analysis, adding a high-speed camera system lets you break down mechanics in real-time.
4. Getting the Most Out of Your Simulator Practice
A simulator is a great tool for improving your game—but only if you use it the right way. Mindlessly hitting balls won’t help you play better golf.
Start by using your launch monitor’s shot tracking data to identify patterns. If you consistently see a left or right bias, work on your club path and face angle. Practicing specific distances with wedges or dialing in iron dispersion can be incredibly valuable, especially when transitioning to real course play.
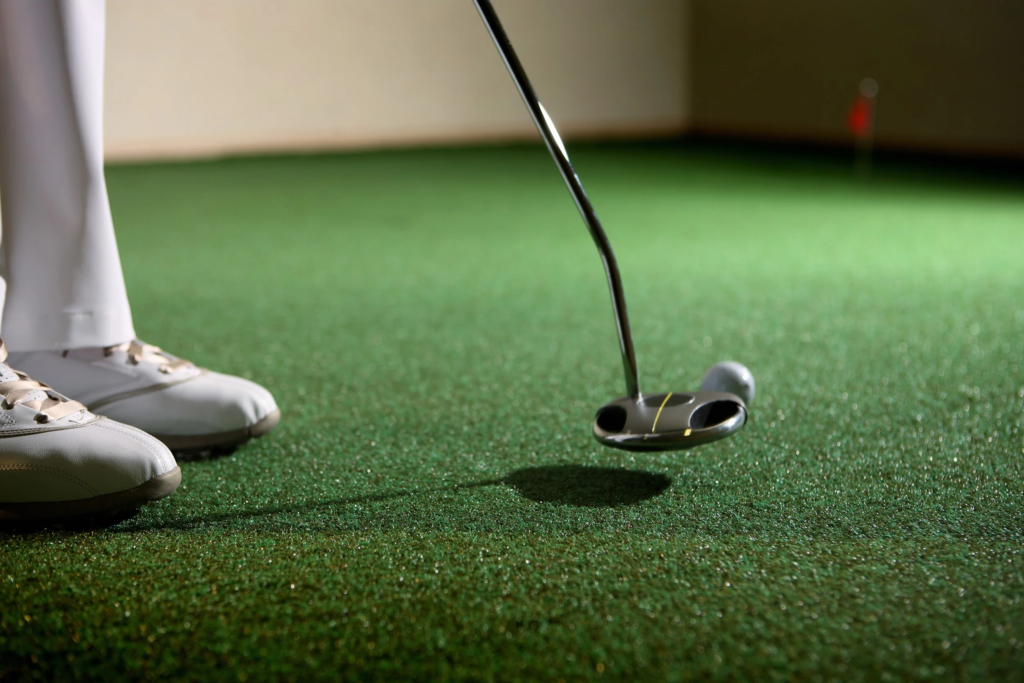
Instead of just smashing drivers for an hour, structure your sessions. Spend time on different aspects of the game—approach shots, shot shaping, and even putting if your software supports it. Simulating real on-course scenarios forces you to think about strategy, shot selection, and pressure situations.
Tracking your numbers over time also helps measure improvement. Ball speed, spin rates, and launch angles are all indicators of progress. When used properly, a simulator isn’t just fun—it’s one of the best tools for lowering scores.
Step 5: Maintaining Your Golf Simulator for Long-Term Performance
Now that your simulator is fully set up and optimized, the final step is keeping it in peak condition. A well-maintained simulator will last for years, while neglecting key components—like the launch monitor or impact screen—can lead to wear, accuracy issues, or costly repairs.
This step covers everything you need to know about maintaining:
- Your launch monitor for accurate readings
- The impact screen and enclosure to preserve image quality
- The hitting mat to prevent wear and tear
- Your projector to keep visuals sharp
- Common issues that develop over time and how to prevent them
A little routine maintenance keeps everything running smoothly and extends the life of your investment.
1. Keeping Your Launch Monitor Accurate
Your launch monitor is the most important (and expensive) part of your simulator, so keeping it clean, calibrated, and properly positioned ensures you always get reliable data.
The first thing to check is alignment. Over time, even a small shift in positioning can cause distances to read short or spin rates to seem off. If numbers start looking suspicious, reconfirm the recommended placement from the manufacturer and make adjustments as needed.
Camera-based systems like SkyTrak+ or GC3 require consistent lighting. If shots start misreading, check for shadows, glare, or changes in room brightness. Dust or fingerprints on sensors can also cause inaccurate readings, so wipe down the lenses with a microfiber cloth every few weeks.
For radar-based systems like Trackman iO, ensure you have enough depth behind the ball for proper tracking. If misreads are happening, double-check that you’re meeting the minimum space requirements.
Finally, keep your firmware and software updated. Many brands release updates that improve accuracy and add new features, so make sure your system is running the latest version.
2. Preserving Your Impact Screen & Enclosure
The impact screen takes a beating—absorbing thousands of high-speed shots. Without proper care, it can develop scuff marks, wrinkles, or excessive wear in the hitting zone, reducing both durability and image quality.
A simple wipe-down every few weeks with a mild soap solution helps remove ball residue and keeps the display crisp. Avoid using harsh chemicals, as they can damage the screen’s surface.
If your screen starts sagging, tighten the tension straps or bungees to keep it firm. A loose screen not only distorts the projected image but can also cause balls to rebound unpredictably. Some screens allow for rotation or flipping—doing this occasionally helps distribute wear more evenly instead of concentrating it in one spot.
For added protection, especially if you occasionally mishit shots high or wide, consider reinforcing side netting or adding foam padding around the enclosure frame.
3. Maximizing the Life of Your Hitting Mat
A quality hitting mat can last years, but constant impact in the same spot will eventually wear it down. If you start feeling hard spots or notice flattened turf, it’s time for adjustments.
One of the easiest ways to extend mat life is to rotate it periodically so that wear is evenly distributed. If your mat allows for multiple hitting zones, alternate between them to prevent excessive wear in one spot.
Regular cleaning also helps. Vacuuming the surface removes small turf particles and dust buildup that can affect the mat’s feel. If you’re using a cheaper mat and start experiencing wrist or elbow discomfort, consider upgrading to something with better shock absorption, like Fiberbuilt or SwingTurf.
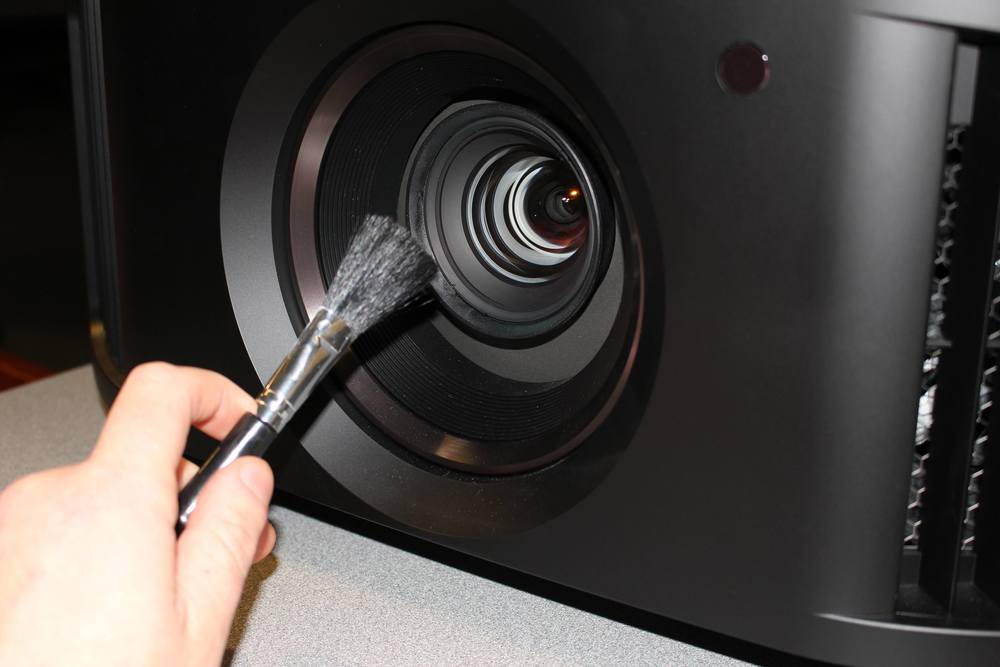
4. Projector Maintenance for a Clear Display
Projectors need occasional upkeep to maintain image clarity and brightness. Dust buildup on the lens can cause a blurry or hazy projection, so cleaning it every few weeks with a lens-safe cloth is a good habit.
Most projectors have air vents or cooling fans—if these get clogged with dust, the system can overheat or start dimming over time. If your projector has removable air filters, clean or replace them as recommended.
If you notice the image looking dim, it might not be the projector itself—sometimes, brightness settings shift over time. Adjusting contrast, brightness, and sharpness can restore a crisp display.
For bulb-based projectors, check the lamp life in the settings menu. If your bulb is nearing the end of its lifespan, replacing it early ensures you don’t experience a sudden drop in image quality.
5. Preventing Common Simulator Issues
Even with regular maintenance, certain problems tend to pop up over time. Knowing how to prevent them can save you from frustrating troubleshooting later.
If your launch monitor starts misreading, the first things to check are alignment, ball position, and lighting conditions. Dust on sensors or a slight shift in monitor placement can easily throw off accuracy.
A wrinkled or sagging impact screen not only looks bad but can also affect how the ball rebounds. Keeping the screen tight and rotating it occasionally prevents excessive wear in one area.
If your projector image looks dull, check both the lens and throw distance. Even a small movement in the mount can distort the display.
For hitting mats that start feeling too firm, an upgrade might be needed. Wrist or elbow pain is a sign that the surface isn’t absorbing enough impact, which can lead to injury over time.
And if you notice ball marks or smudges on the screen, clean them immediately. Built-up residue makes the projected image look dull and reduces overall clarity.
Your Golf Simulator Is Built to Last
With the right setup, optimization, and maintenance, your golf simulator will stay accurate, realistic, and enjoyable for years. A few simple habits—keeping your launch monitor clean, tightening the impact screen, rotating your hitting mat, and checking projector settings—help prevent small issues from becoming bigger problems.
Now, your simulator is fully built, fine-tuned, and ready for action. Whether you’re grinding through a practice session, playing full rounds with friends, or dialing in your distances for the course, your indoor setup will keep you sharp year-round.
Golf season never ends when you have a simulator. Now, go play.